Rod Building
 paul (paul4barbus) whiteing
My rods for Barbel Fishing - building
This is mainly about my Barbel rods, for use with a centrepin, as I like them built. This is the way I build a single rod, maybe a pair, these days - nothing startling, nothing special :
Determining the dimensions of the build
There is no quick way, I just take it one stage at a time
- For my rods I already, by this time, know what handle length I like, so I fit my centrepin reel and check the balance . Ok, there's no cork handle nor rings at this point but it usually works out right.
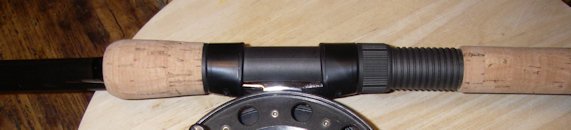
Balance should be so the rod is just tip-heavy, so a balance point about 2" in front of the reel is ideal ( see here ) . - Fit tip ring - araldite is my preference
- Bore out lower-butt cork shives and slide into approximate position
- Roughly fit reel seat
- Bore out upper-butt cork shives, total 2" long, and slide into approximate position
- Fit centrepin reel and check balance of rod, adjust if necessary by moving reel seat up or down, adding cork shives as required - and add weight (temporarily) as/if required
- Remove centrepin reel and insert the butt into jig ( see here )
- Add ten # dummy-rings along length of rod blank - these are made from solid-inner electrical wire
- Secure some visible line (I use fly-line backing) at butt end (to a hook placed behind the jig) and thread this through the dummy rings and the tip ring
- Carefully add weight (I use a small wire-handled container, and add solid weight into this) until the rod is flexed to 90 degrees at the tip - this is often called the test curve
- I adjust these dummy rings in two ways - one to approximate the correct stand-off dimension from the rod blank as per each chosen size of the Fuji BSVOG ring in each position, and secondly to ensure the line "follows" the curvature of the rod
- I check and re-check the ring positions until I'm happy - go away, have a cup of tea, come back for another look - then the positions are marked with masking tape and felt-tip pen
- The weight is carefully removed from the container and the rod is rod is carefully removed from the jig
- The marked positions of the rings are carefully measured, both tip-to-ring and ring-to-ring, and written down
(# nine is the optimum number for my Barbel rods, so add one for the extra ring I use)
Balancing the rod
For other rods and handle length preferences I'd add weight to the end butt as/if required, after shaping the corks, and just prior to fitting the Wye Button. If you use both centrepins and fixed spool reels then balance is, of course, a compromise.
My spacing jig
This is a short length of 2" plastic waste-pipe very securely held, horizontally, just below the roof of my workshop. It is important when using this jig that the line threaded through the dummy rings is very secure at the butt end and at the tip (ring), such that when the blank is under compression there is no danger of the line becoming loose and the blank assuming it's natural straight position - as happened to a friend of mine when it all went wrong and the blank suddenly and disastrously whacked upwards and it was not a pretty sight.
Making the handle
There is no quick way, I just take it one stage at a time!
- Allowing for the Wye Button, glue on the single cork shive that will sit above the Wye Button - I prefer to leave the glue to dry before proceeding (I use a quick drying, gap filling, waterproof, polyurethane glue that dries in about 10 minutes - it requires great care in use as it can be very messy)
- Slide on and glue the shives up to the reel seat
- Pack under the reel seat with 3 "windings" of masking tape but don't glue the reel seat yet
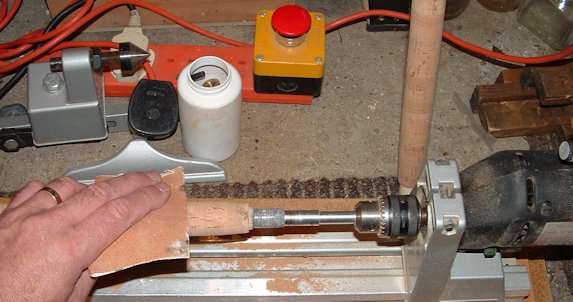
- Insert the tapered mandrel in the lathe into the bottom of the butt and shape the cork carefully using file and sandpaper, especially at the point adjacent to the reel seat
- The 2" long upper-butt section is fabricated, glued and pre-shaped especially at the point adjacent to the reel seat, before final fitting

- Glue on the reel seat
- Glue on the upper-butt section
- Give the corks a final finishing pass with finer paper
- Pack under the Wye Button with masking tape
- Glue (Araldite is my preference) on the Wye Button
to be continued ...
last updated 23/11/17